A friend asked me how I am managing to make such great progress with my 2024 Organize and Declutter project. It turned into a whole “thing” so I am going to post it here and just give her the URL. 🙂

Professional cleaners say they get through their work because all they do is clean. They don’t get distracted the way we do by our STUFF. We can get similar fast results by taking a similarly targeted approach to cleaning, as well as to decluttering and organizing.

Do a sweep of the whole house with a trash bag and ONLY touch actual trash. Ignore everything that is not going to the curb!!

Do a sweep of the whole house with a laundry basket and ONLY touch dirty clothes. Take them to the laundry room.

Do a sweep of the whole house with a dish pan and ONLY touch dirty dishes and other food-related items. Take them to the kitchen.

Do a sweep of the whole house with a recycle box and ONLY touch things that are ready to recycle. Then put them on the curb or in the trunk of your car. (Then don’t forget to drop them off! LOL)
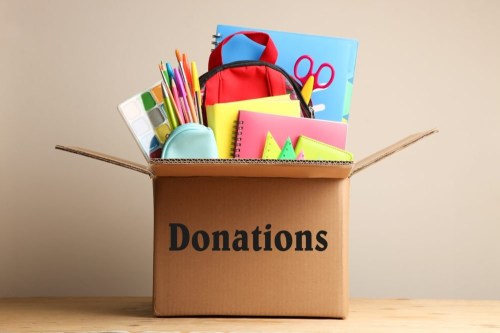
Do a sweep for donations. Or do what I do and create a designated spot for ongoing collection to put things as you encounter them. Whenever hubby has an appointment near the drop off center, I hand him the box and start a new one.

Doing a series of targeted sweeps like this will get you a long way towards feeling less like you’re choking on your own stuff. So after each step, congratulate yourself for getting rid of unwanted clutter! Now … on to the organizing part!
Re: Getting advice from professional organizers. There are a lot of them, but in my opinion, Clutterbug has the best advice. I haven’t been slavishly applying her tips, just listening to her videos here and there, waiting for the nuggets that resonate with me.
- Clutterbug’s website @ https://clutterbug.me/
- Clutterbug’s YouTube channel @ https://www.youtube.com/@Clutterbug
I’m going to talk about targeting again. But this time, it’s zeroing in on a very particular thing about your stuff that is annoying you. One of my first 2024 projects was to do something about my hanging kitchen utensils. The two strips of hooks were both under the upper cupboards and both had problems. One was a wedding present that was very poorly designed for the utensils that came with it. The other had accumulated more than double the things than there were hooks and all of it was bunched up in the same corner with two canisters of hole-less utensils and right next to my magnetic strip of knives. I was always having to move things to get what I wanted, then put back all the crap that had fallen off while I was at it.

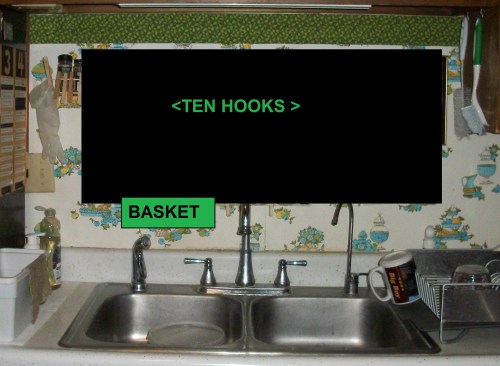
I decided to take a very targeted approach, keeping firmly in mind that my goal was just to make my hanging utensils less annoying. I got them ALL out, gave it some good thinking (the most important part!!), identified which utensils actually would stay on those blasted wedding present hooks (not the ones that came with them!) and which utensils could live in my two “short things” and “tall things” canisters. I ended up donating a few things that I honestly never use, but decided to keep some that I rarely use, but when I need them, they are the best tool for the job. E.g., my rolling pin. I also decided the wedding hooks and utensil canisters could stay in use and where they had always been, but that I seriously needed a better storage solution for the ten big hanging utensils shown above.
I had to consider several things.
- What did I want? I wanted to be able to reach out and take down or hang up a utensil without having to duck, scramble, or argue with other utensils.
- How much space do I need and where do I have said space at eye level? Over the sink.
- What “organizing hanging things” solution would work for me? I took measurements and did some serious internet sleuthing until I found a metal peg board system at Lowe’s. I made the shopping list below for Dearest, who doesn’t like to think too hard or get things wrong. He was delighted that everything was exactly where I said it would be.

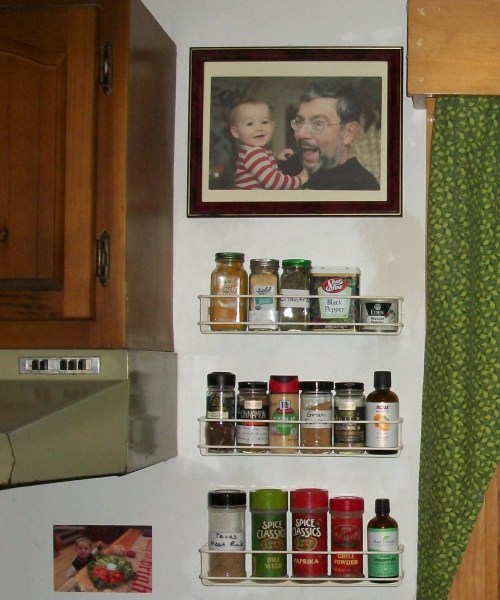
The next question was to figure out what to do with the stuff that was already on that wall, which turned into another Organize and Declutter adventure featuring my disorganized spices. Some were in a cupboard, some were over the sink, some just hung out by the stove … I got them all out and sorted, composted a few that were just way past it, and made a couple of policy and labeling decisions that have really helped me cook more efficiently and creatively.
At each step, I’d tell my husband what I was thinking about and he’d say, “But what are you going to do with that stuff?” And that, right there, is what I think may be our biggest roadblock to getting anything organized or decluttered. I call it “globalizing.” Keep. Your. Project. Targeted.
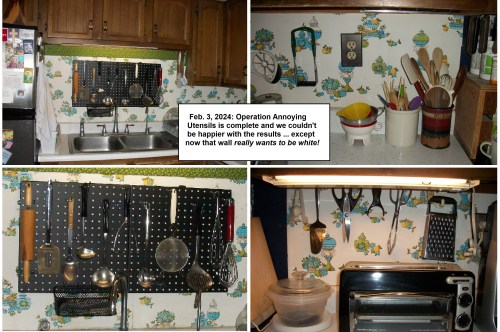
While I was saving my pennies for the Lowe’s purchase, I got the spice thing planned and started, then grabbed Mr. Handy on a day off and asked him to move the racks. He was so delighted with the result that he didn’t even remember that I have a little pile of things I took off that wall to deal with … some day. Not today. It’s in the “Round Tuit” place. And I’ll get to it. Eventually. But for now, I am too busy reveling in how easy it is to COOK!!! I hadn’t realized how stressful clutter can be until I got a couple of these targeted projects done. It’s really amazing.

One ginormously helpful tip I learned from Clutterbug is to not buy any organizing tools … no containers, bins, hooks, shelves, whatever … until after you have identified what you want to store, where you want to store it, what the dimensions of your stuff and storage needs are, and what limitations you have. THEN, you do your measuring and thinking (the most important part). THEN, you do your shopping. And only after you are certain you’ve found the best possible storage solution do you purchase anything. The fun happens when you finally get to put your stuff away in your wonderful, targeted, and perfectly fitted organizing tool! And keep in mind that buying something new may not be the best solution. The only thing I bought for “Operation Annoying Trail Mix” was a bottle of glue to reinforce and pretty up a cardboard box. Hubby cut down an Amazon box to the dimensions I wanted and I had the fabric in my overcrowded fabric stash … which scored me a small, but let’s cheer anyway win on reducing the fabric mess! LOL

Over time, I have developed a list of Stuff Management rules that I use when I’m doing the Big Think part of a targeted project. I’ve also found a few online suppliers that have excellent organizing tools at reasonable prices. I got the Poppin bins (below) from The Container Store @ https://www.containerstore.com/welcome.htm for $14 each. They’re pretty, sturdy, and exactly the right size for my shelves.
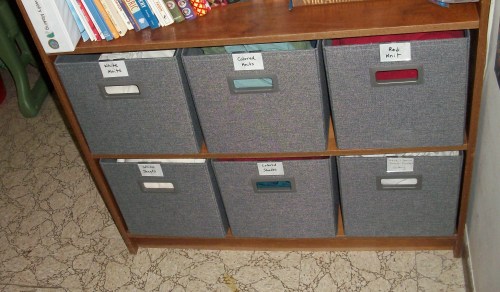
They solved two problems, one of which was my way too much fabric issue. These bins are STUFFED with the old bed sheets, batting, and other “not pretty quilting cotton” materials I use for my clothes and quilting projects that used to be piled in dusty, annoying corners. The other problem the bins solved for me was that those bottom two shelves are the worst dust magnets. I have been using them for books, but honestly, they were too low and too dusty to be any good for books. My thinking on this project actually began with the dusty books. Clutterbug talks about bins a lot, so once I had the idea and found those Poppin bins, the solution to my dusty, annoying piles just happened. Two for one! The bins come in prettier colors, but I decided on gray because of the inevitable dust. Instead of the dust dulling a pretty color, it will just make the bins look … well … gray. 🙂

I’m a label person. And I use a LOT of essential oils. When I started with them, I bought a couple of wooden boxes. Then I got more and more oils and they just metastasized all over. I realized I needed to reorder some, but since I had zero idea what I even had, I picked that for an Organize and Declutter project. This also didn’t cost me much, since I had these wire racks hanging out in another room, collecting dust and clutter. Putting all my oils in one place and at eye level has been fabulous. I alphabetized the bottles, but there are so many that some had to be behind others. My dd suggested label holders, which I got from Amazon, 50 for $8 @ https://www.amazon.com/dp/B08QX6PQFQ. Thankfully, they also fit nicely on the Poppin bins as well. (Please ignore the weird wall. I want to paint the bathroom; that patch is a color I tried and rejected.)

Another of my little 2024 targeted projects was the bathroom cubbies. I took everything out onto a table and sorted it all into three approximately equal categories that I could label in a way that made sense. Then, I had Dearest look at the piles and tell me if the categories and label names I’d chosen made sense to him. Our brains work very differently, so it’s important for me to check with him before proceeding. I couldn’t find any pre-made bins that fit the cubbies (5” x 5” x 5”), but I did find these (5″ x 5″ x 6″) corrugated boxes @ https://www.uline.com/Product/Detail/S-4704/Corrugated-Boxes-200-Test/6-x-5-x-5-Corrugated-Boxes. I got a pack of 25 shipped flat for $15 and only needed to slice an inch plus the top flaps off, then assemble them to make perfectly fitted cubbie bins.

I thought I’d be okay with the corrugated until I had the idea to photograph our pretty shower curtain, print the picture on to paper and decoupage it to the cardboard. I also found some card stock in my paper stash that matches the bathroom counter top. I used that to line the boxes and make the labels. They turned out so cute! And it is SO much easier to pull a bin out and put it on the counter to find what we want than it was to root around in the open cubbies. I also really like it that I know exactly where the essential, but rarely needed tools are. E.g., tick twister, thermometer, pill splitter. Even better, my hair scissors aren’t constantly threatening to fall on my head when I use the toilet!

Phew! So that about covers the “How I am succeeding at organizing and decluttering my messes.” I’ll let all y’all go now, so I can get back to sorting beads and figuring out how many I need of which styles of these containers I’ve chosen @ https://www.containerstore.com/s/office/craft-hobby/stackable-craft-organizer-drawers/12d?productId=11008488. I’m so excited about turning my “Bead Drawer From Hell” into a delightful art resource! I had hoped the drawer could fit under my bed to hold overflow yarn, but it’s just a smitch too tall, so it’s going to ReUse It! The overflow yarn is in the “Round Tuit” pile. I’ll get to it. Eventually.